
Product
Journeys — automated WhatsApp flows
Build node-based automations: Entry, Delay, Wait For, Split, WhatsApp, and Exit — including Abandoned Cart and how Events variables bind on the WhatsApp node.
 1:18
1:18Video needed
Watch video guide →
What it is
A Journey is an automated graph of nodes. Each Contact who enters walks the graph until Exit. Unlike a Broadcast (one manual send), a Journey keeps running for new entrants after you activate it.
You build Journeys from nodes on a canvas: Entry (who starts), Delay or Wait For (timing), Split (branch), WhatsApp (send a Template), and Exit (done).
Presets like Abandoned Cart, Segment Message, and Custom Event Follow-up drop a ready-made graph. They are starting shapes — not special node types — so you can still edit every node.
When to use it
- Recover abandoned carts after checkout started but no order
- Welcome or nurture Contacts when they enter a Segment
- Follow up after a Shopify, WooCommerce, or custom API event
- Send a Template that needs Events variables from the trigger payload
Step by step
1. Create from a preset or blank
Go to Journeys and click Create Journey.
Choose Blank, Abandoned Cart Recovery, Segment Message, or Custom Event Follow-up.
Name the Journey, then open the canvas.
2. Entry node — Segment or Event
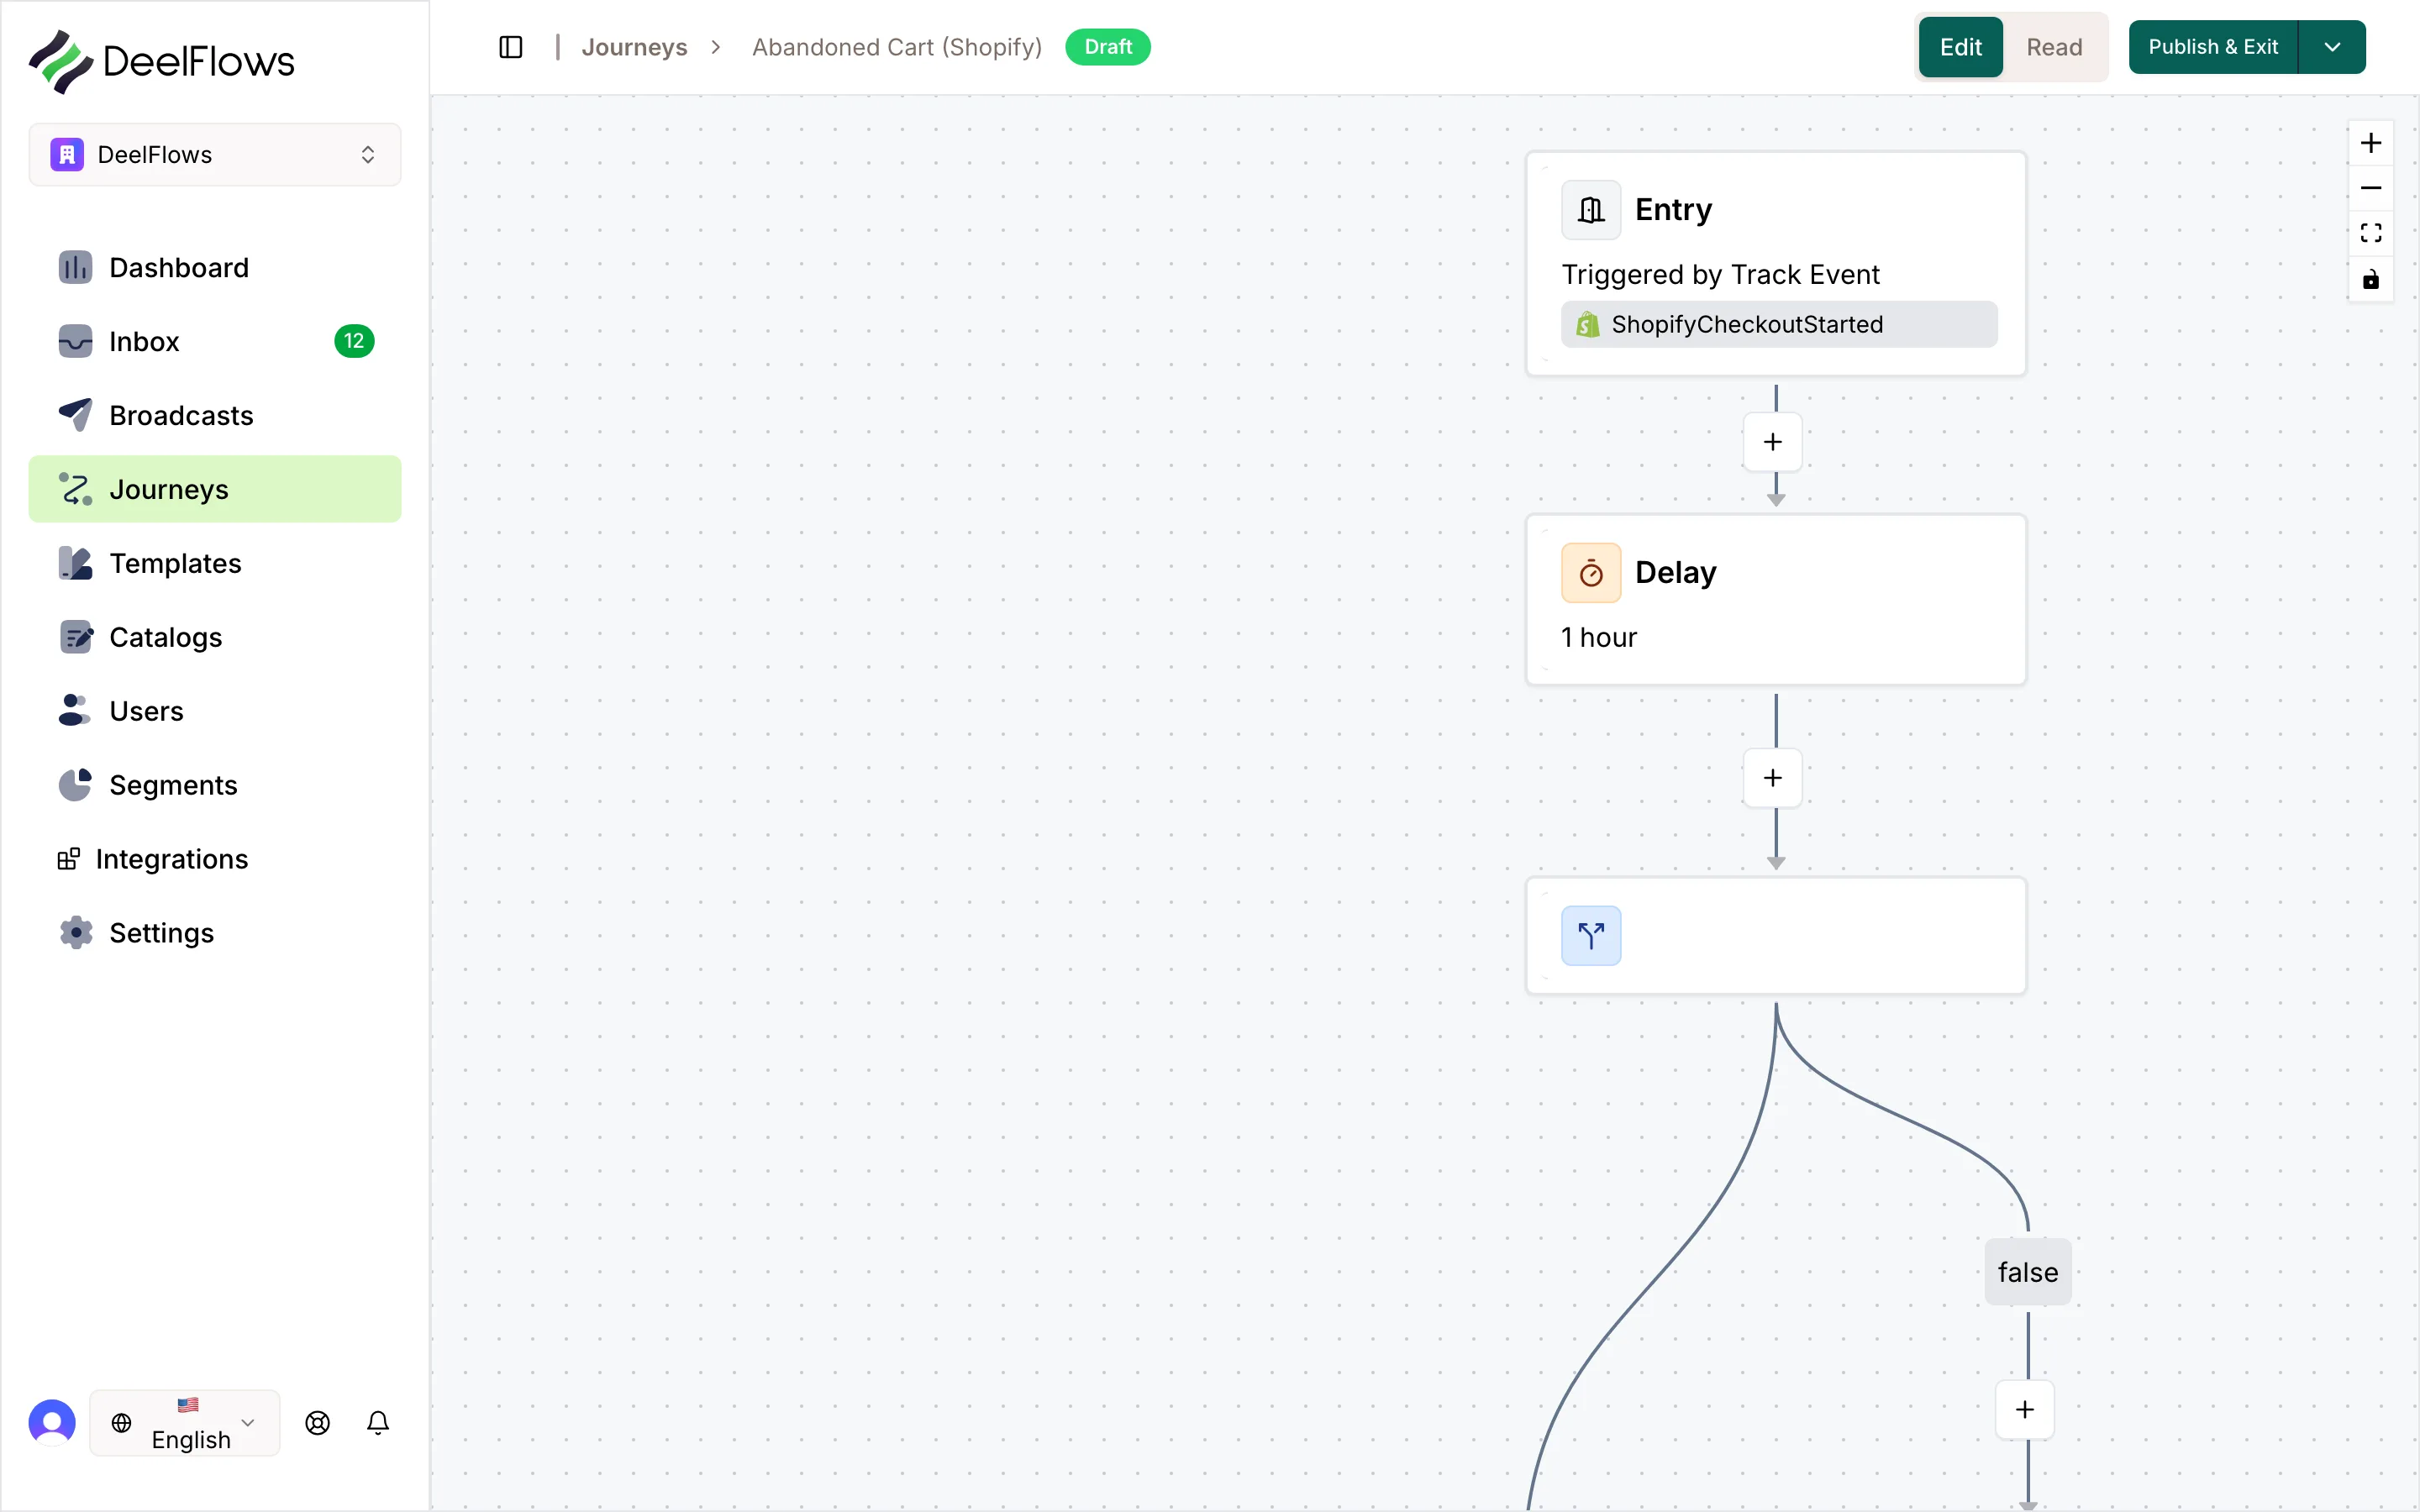
Every Journey has an Entry node. Pick Segment entry (Contact is in a Segment) or Event entry (Contact fires an event such as checkout started).
Set frequency: Once (one run per Contact) or Recurring (can run again — required for carts that happen more than once).
Event Entry is required if your WhatsApp Template uses Events variables ({{event_…}}). Segment Entry has no event payload, so those placeholders cannot resolve.
WhatsApp delivery events (sent / delivered / read) are not offered as Entry triggers — use store or custom API events instead.
3. Delay node
Delay pauses the run for a fixed duration (minutes, hours, days), then continues to the next node.
Use Delay after Event Entry when you want to wait before checking whether someone ordered — that is the Abandoned Cart pattern.
4. Wait For node
Wait For pauses until the Contact enters a target Segment, or until a timeout — then takes the timeout branch.
Important: Wait For cannot be used with Event Entry. If Entry is an event, use Delay + Split instead (as the Abandoned Cart preset does).
5. Split node — Segment or performed event
Split branches Yes / No immediately (it does not wait).
In Segment — is the Contact currently in a Segment?
Performed an event — did they fire event X? Optionally Only count events after entry (since journey start). Turn that on for Abandoned Cart so OrderCreated must happen after CheckoutStarted.
Yes path and No path each continue to their own next nodes (message, delay, or exit).
6. WhatsApp node — Template and variable bindings
Select an approved Template. DeelFlows sends that Template, then continues — or exits early if the send fails.
Template Variables on this node: User attributes and Global shortcodes auto-resolve (you usually will not see Manual/Event controls for those names).
Events placeholders ({{event_checkoutUrl}}) default to Event Field binding. Map the path to the property on the trigger event, or choose Manual to hard-code a string override.
Event Field binding requires Event Entry. If you see a warning that Event entry is missing, change Entry or remove Events variables from the Template.
Optional: override header media (image / video / document) for this send without changing the approved Template body.
7. Exit node and activate
Exit ends the run. There are no settings. Whether a Contact can enter again is controlled by Entry Once vs Recurring.
Review the graph, then Activate. New matching Contacts start flowing. Presets are editable — open each node and set your Template before going live.
8. Abandoned Cart preset (worked example)
The preset builds: Event Entry (CheckoutStarted) → Delay → Split (OrderCreated since entry?) → Yes: Exit · No: WhatsApp → Exit.
Recurring is on so the same Contact can abandon more than once.
Shopify and WooCommerce use different event names; the preset picks the right ones from your integration.
Put checkout URL (or similar) in the Template as an Events variable, then bind it on the WhatsApp node to the event path.
FAQ & gotchas
Which nodes can I add from the palette?
Operators add Delay, Wait For, Split, and WhatsApp. Entry and Exit are always on the canvas. Email and SMS message nodes are hidden — DeelFlows Journeys send WhatsApp only.
Why must Events variables be bound on the WhatsApp node?
Unlike User attributes and Global shortcodes, event data is not stored on the Contact. It lives on the Journey’s trigger event. The WhatsApp node is where you map {{event_…}} to that payload or override it with Manual text.
Can I use Wait For with Abandoned Cart?
No. Abandoned Cart uses Event Entry, and Wait For is incompatible with Event Entry. Use Delay + Split with “since entry” instead — that is what the preset builds.
What if the WhatsApp send fails?
The run exits early to Exit. Check Template approval, Opt-in for Marketing, and WhatsApp connection.
Continue learning
Related articles
Inbox - Manage Conversations
View and reply to WhatsApp messages from Contacts. Track lead scores, assign to Operators, and move Deals through your Pipeline.
→Contacts and User Properties
Store information about people who message your business. Add custom user properties to track details that matter to you.
→Segments - Group Your Contacts
Create filtered groups of Contacts based on user properties, behavior, or Opt-in status. Use Segments to target specific audiences.
→Pipeline and Deals
Manage sales opportunities with a visual kanban board. Create Deals from Conversations, move them through custom stages, and track revenue.
→Can't find what you're looking for?
Contact Support